2016 Tesla Model S Interior and Exterior

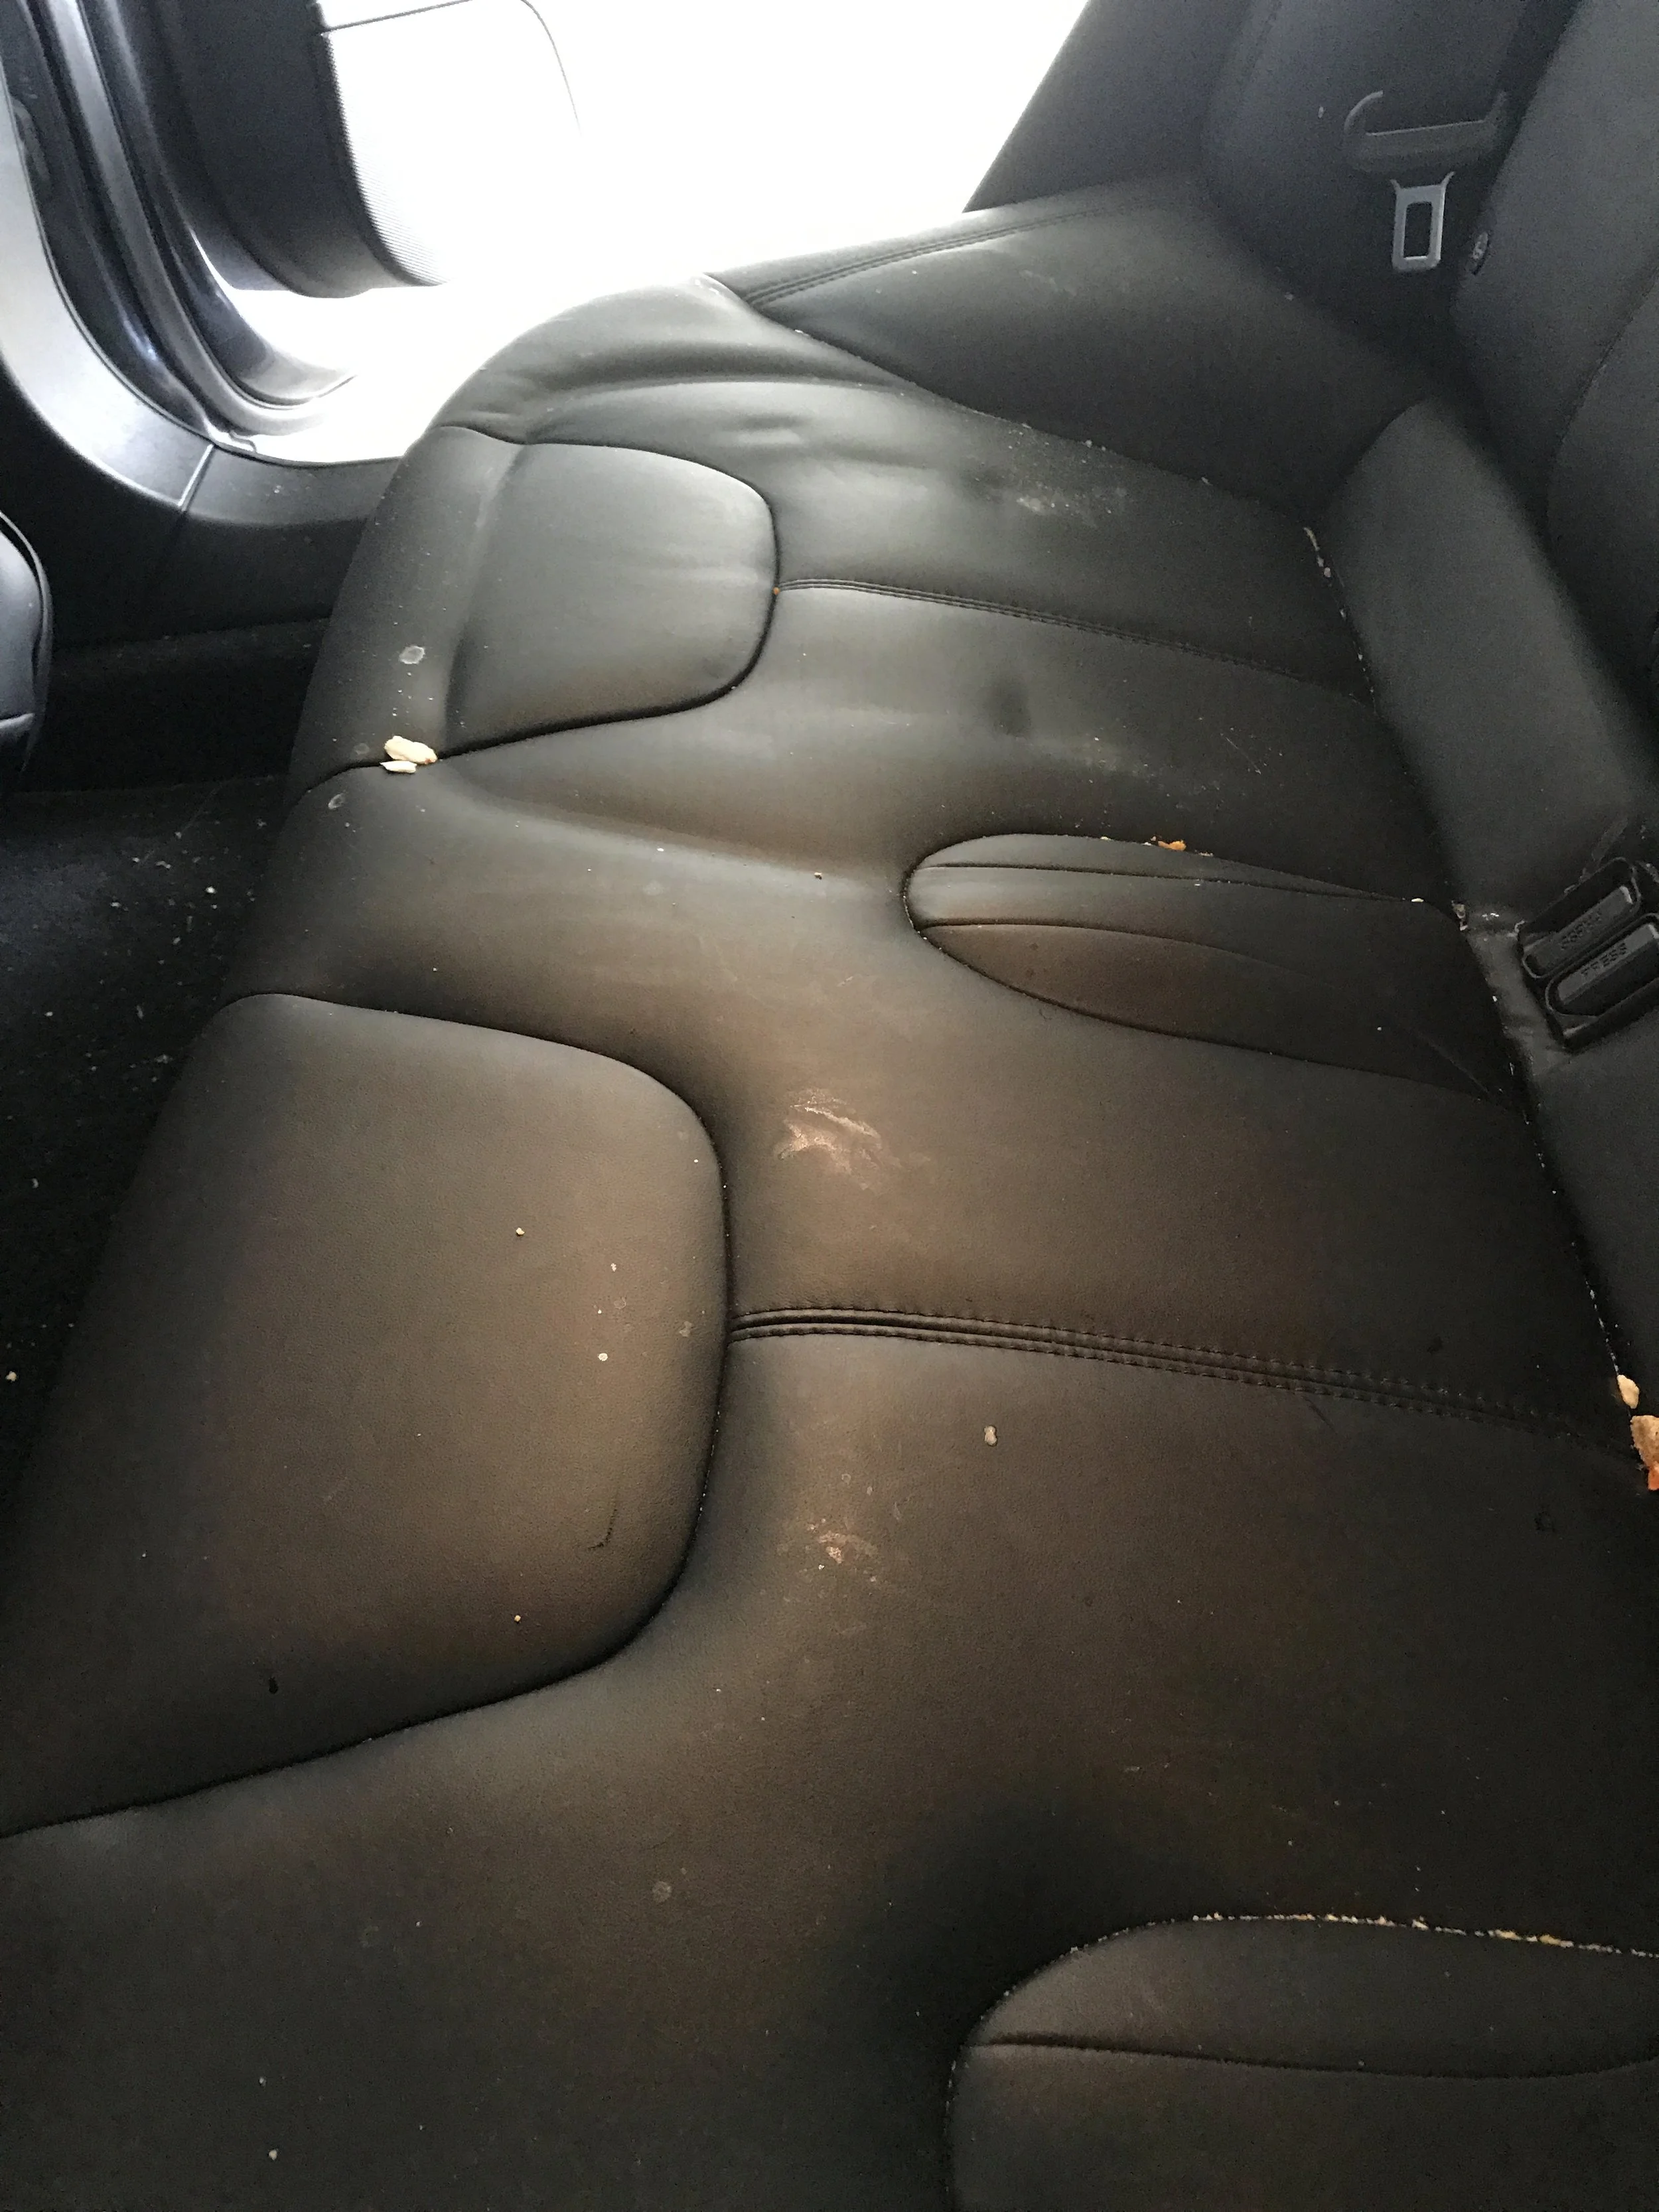
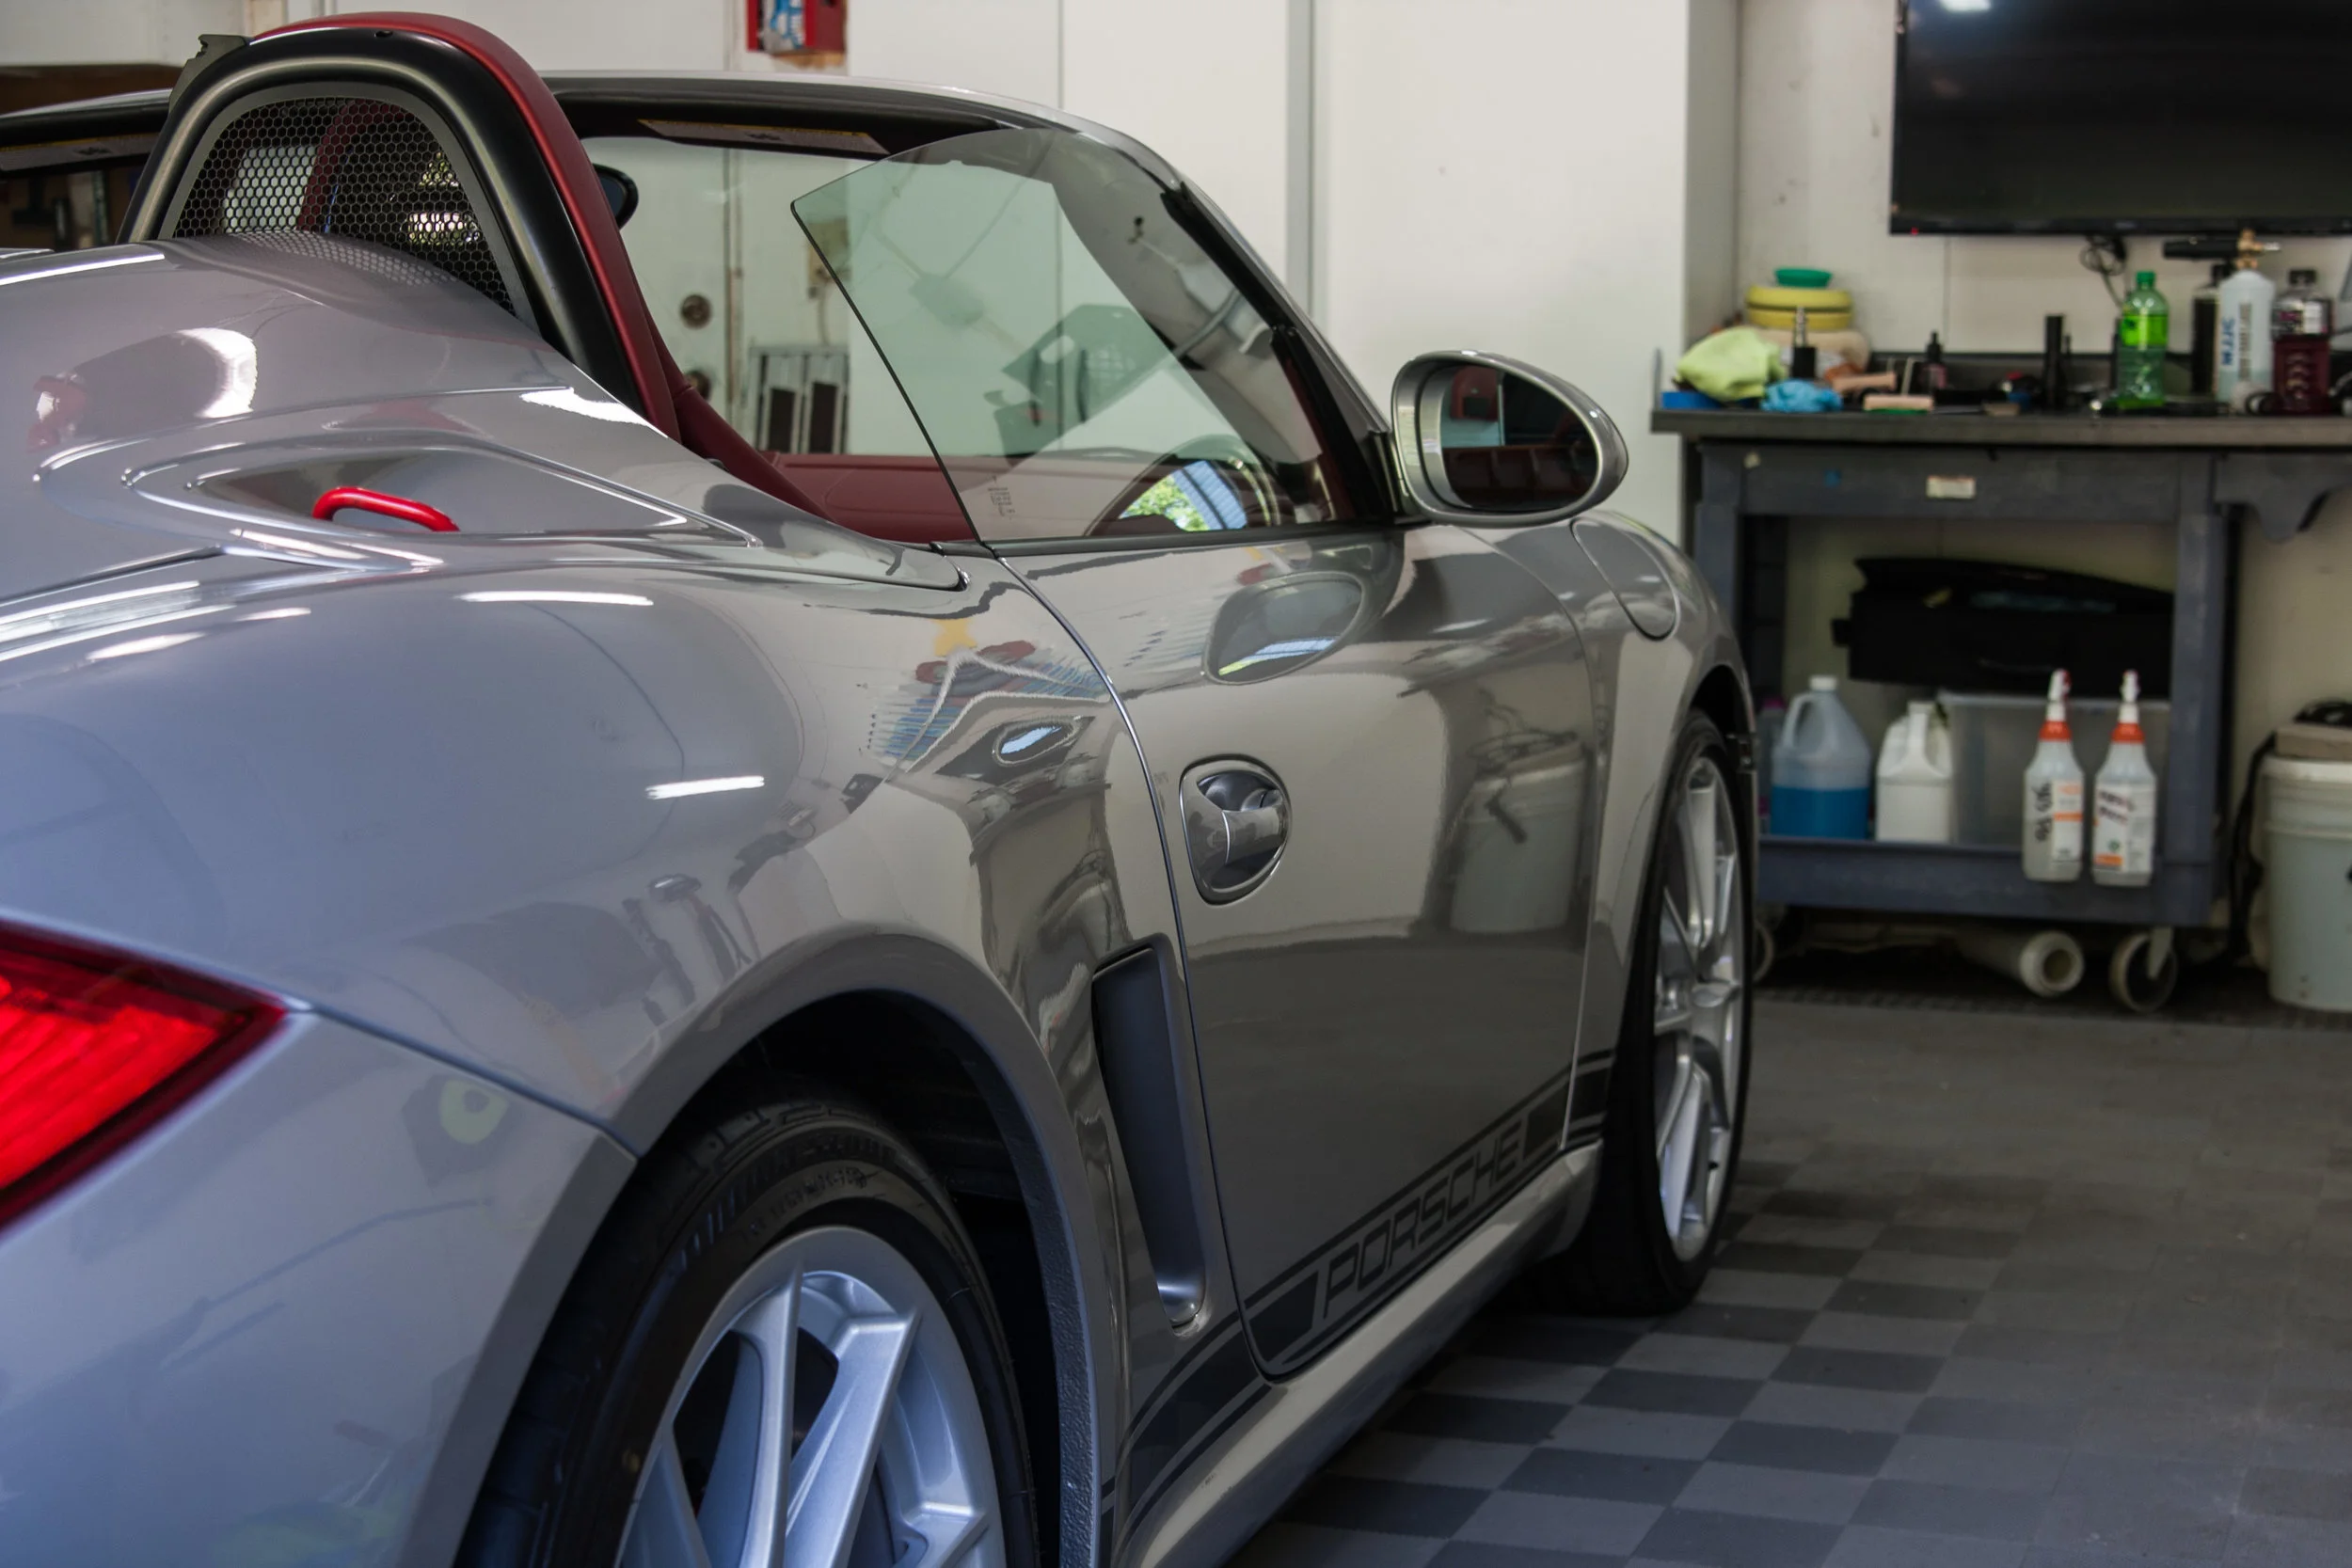
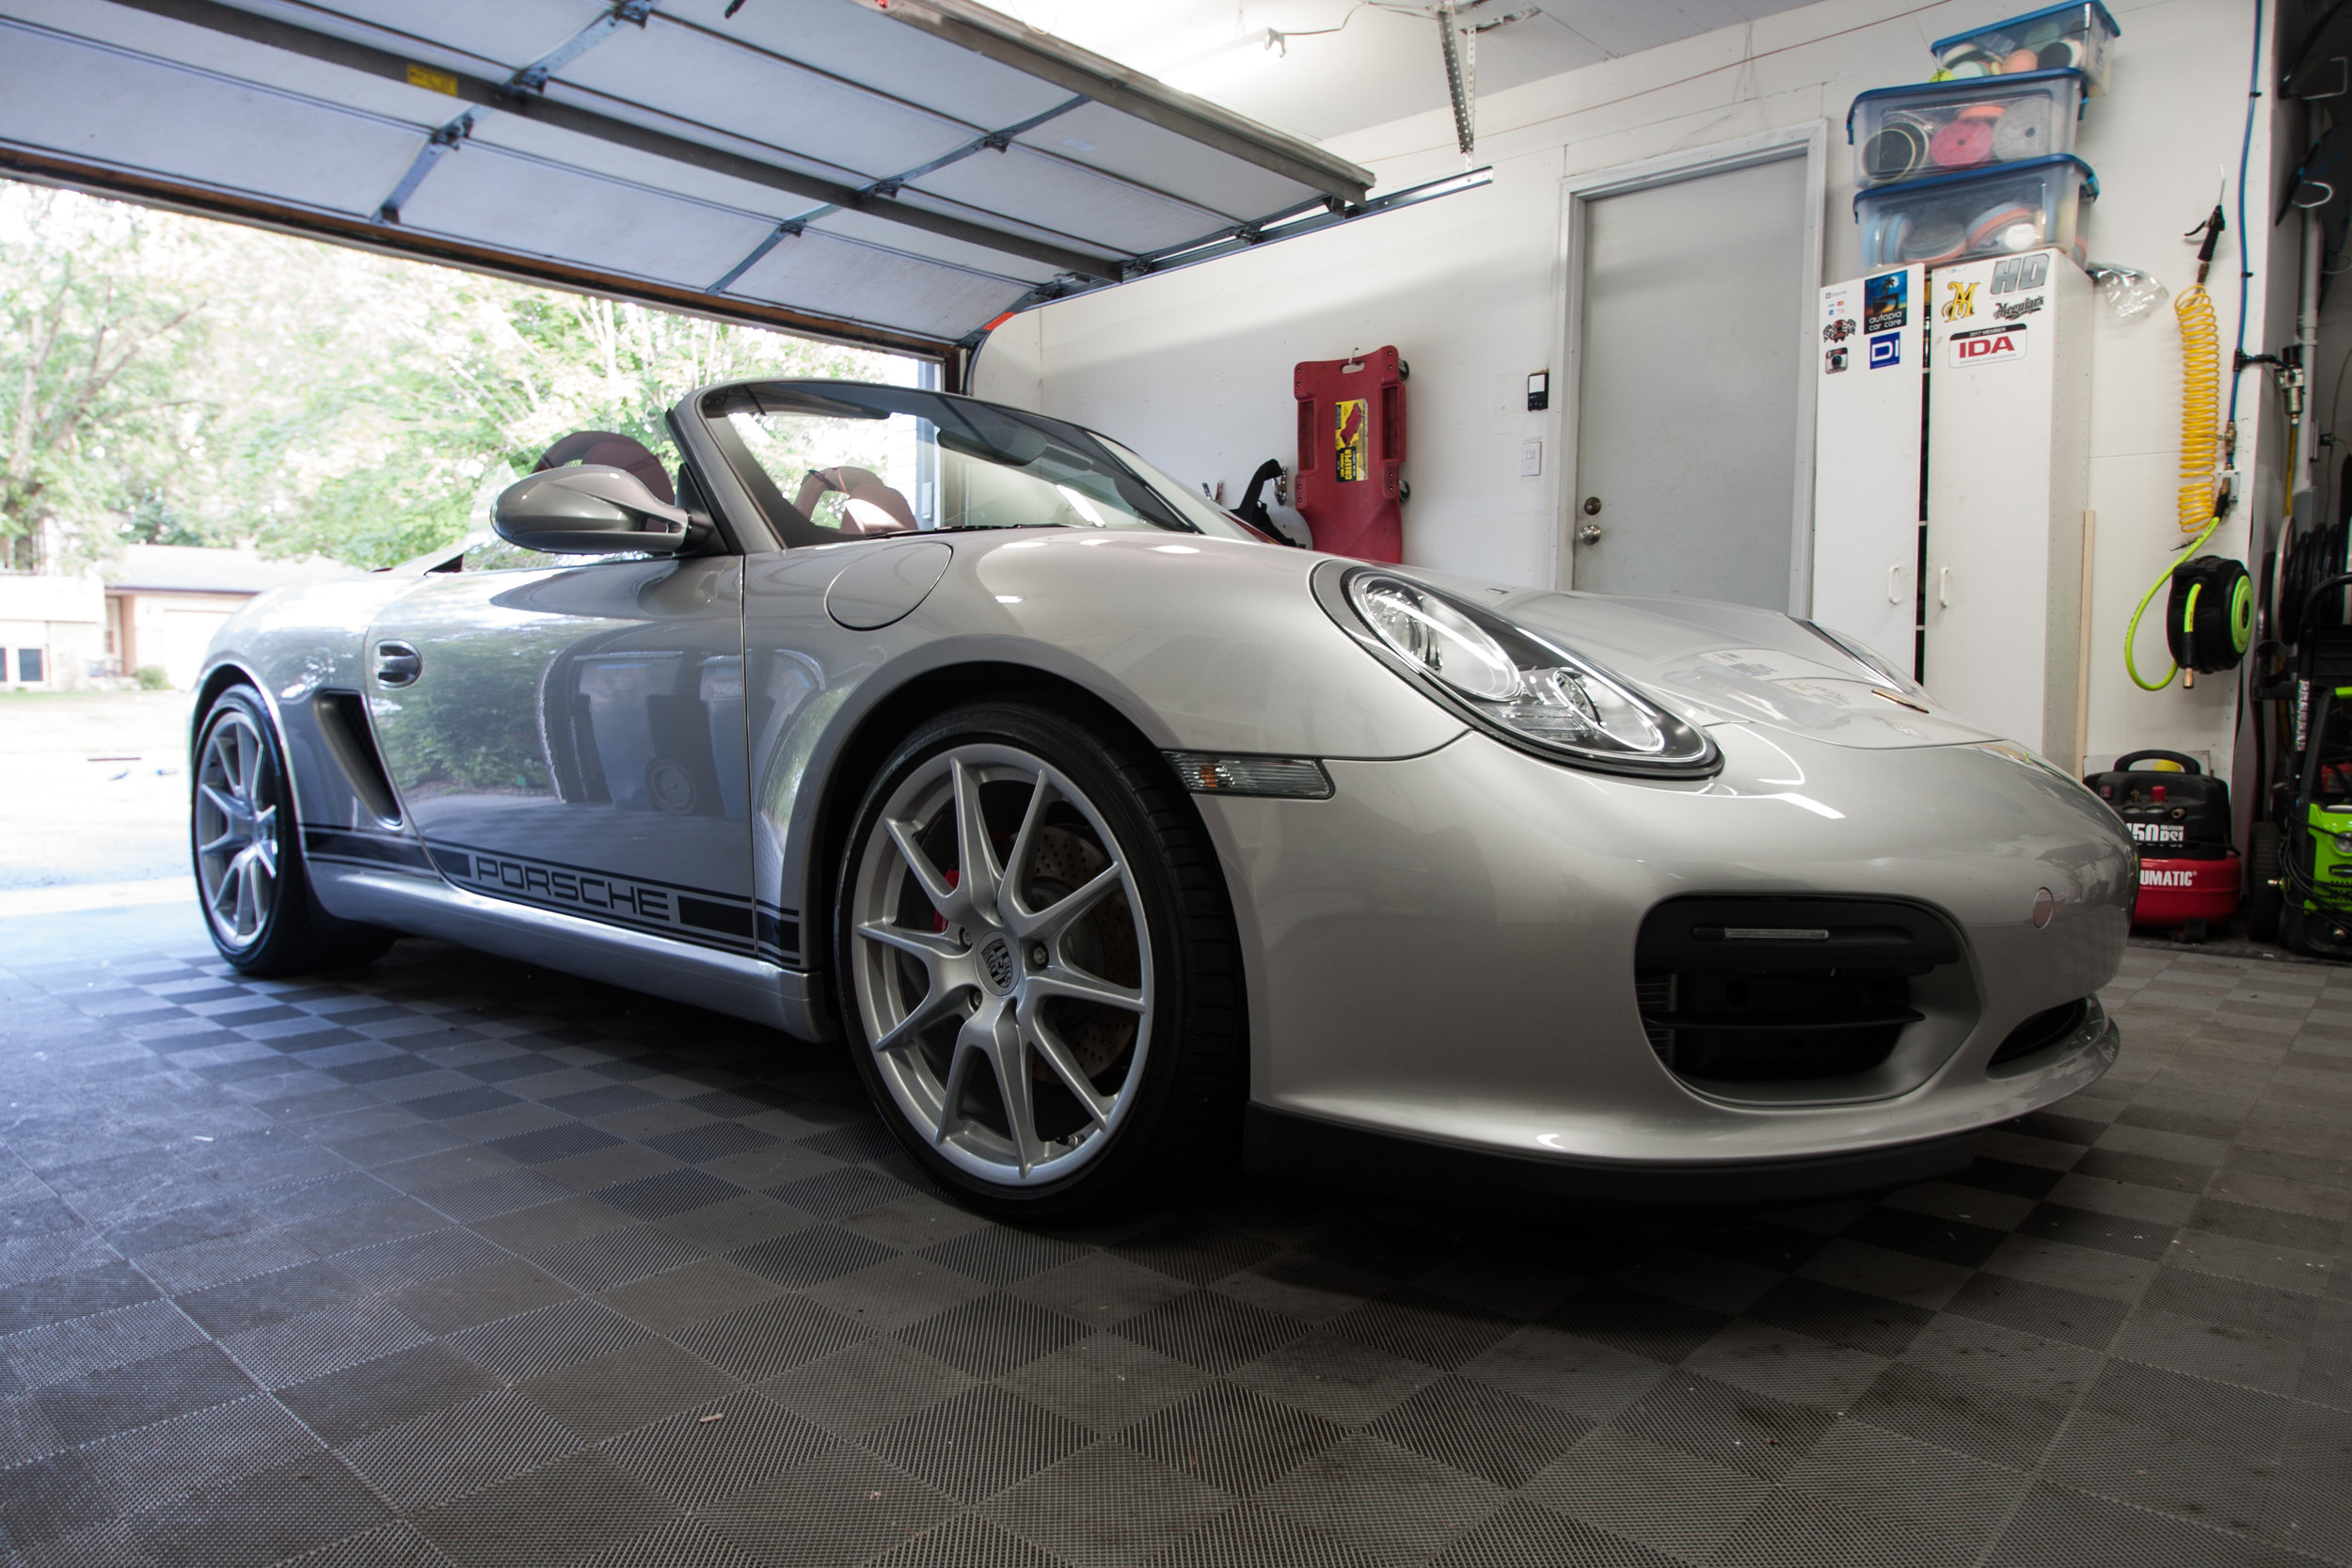
This car came to me as a referral from a current client.  It has been used to ferry the kids around and it certainly shows.  Because there is no transmission tunnel, the floor of this car is flat and was a joy to vacuum, it such a thing can be said. This car was set to be presented in a small car show the following day, unfortunately it was raining, but I'm sure the paint was beading water better than anything else at the show.   

Process

  • Wheels cleaned with Ardex Proper and various brushes
  • Wheel wells and tires cleaned with Meguiars D108
  • Pre-foamed with Angelwax Fastfoam
  • 2BM hand wash with Carpro Reset.
  • Mechanical Decontamination with clay mitt and ONR as lube. 
  • Spot compounding and polishing of deeper scratches with Rupes Ibrid Nano, blue and yellow foam and Rupes Gels
  • Paint was sealed with carpro Reload
  • Wheels were protected with Carpro Hydro2
  • Tires were dressed with carpro PERL
  • Glass cleaned with Blackfire Glass Cleaner
  • Interior was vacuumed
  • Carpets and hard surfaces were steamed
  • Leather was cleaned and protected with McKee's leather lotion
  • Hard surfaces were protected with Blackfire Interior Protectant


2012 Audi A4 Intensive Polish

I worked on this client's SQ5 a short time ago and it was time for his wife's car to get a similar treatment.  He jumped in the deep end with his first audi being the SQ5, but his wife actually owned her audi before they purchased the SQ5.  This car hasn't had a formal detail during their ownership and while they do care for it, time has taken it's toll and it was ready to be rejuvenated.  Because this is a daily driver, is often exposed to the elements and can't look better than the SQ5, we chose to go with an intensive polish to remove the majority of the defects and bring back the clarity of the paint.

number of different polishers were used to get into all the tight spaces.  

Process

  • Wheels cleaned with Ardex Proper and various brushes
  • Wheel wells and tires cleaned with Meguiars D108
  • Pre-foamed with Angelwax Fastfoam
  • 2BM hand wash with Carpro Reset.
  • Mechanical Decontamination with clay mitt and ONR as lube. 
  • Spot compounding of deeper scratches with Flex PE-8, orange foam and Angelwax Ressurection
  • Polished with Boss21, rupes yellow pad and Angelwax Regenerate, Rupes Nano and LHR75
  • Paint was coated with Angelwax Ti-22
  • Wheels were coated with Kisho SI-02
  • Tires were dressed with carpro PERL
  • Glass cleaned with Blackfire Glass Cleaner


2014 Audi A4 Compound, Polish and Ceramic Coating

This client was recommended to me through one of the local car clubs.  We met a few weeks before the detail to inspect the vehicle and review potential options.  Brilliant black is one of the more difficult colors to work with.  It is often quite hard paint and does not always finish down easily.  The owner also desired to install a ceramic coating the make maintenance easier and for long term protection.  Based on teh owner's needs for a coating we chose Carpro CQuartz UK, which should offer 2+ years of easy maintenance and great gloss. We had initially planned to do an intensive polish and then evaluate the results to determine if more was necessary.  Based on the results, we chose to step up to a compound and polish to safely remove all but the deepest defects and provide a great based for the ceramic coating. 

number of different polishers were used to get into all the tight spaces.  

Process

  • Wheels cleaned with Ardex Proper and various brushes
  • Wheel wells and tires cleaned with Meguiars D108
  • Pre-foamed with Angelwax Fastfoam
  • 2BM hand wash with Carpro Reset.
  • Mechanical Decontamination with clay mitt and ONR as lube. 
  • Compounded with Boss 21, meguiars MF and angelwax Ressurection
  • Polished with Boss21, rupes yellow pad and Angelwax Redemption, Rupes Nano and LHR75
  • Paint was coated with Cquartz UK
  • Wheels were coated with Kisho SI-02
  • Tires were dressed with carpro PERL
  • Glass cleaned with Blackfire Glass Cleaner
  • Trim was protected with Ultima Tire and Trim Guard

2012 VW Golf Pre-sale Detail

The owner of this car recently purchased a replacement and is preparing it for sale, this includes getting it cleaned up and ready for a new owner.  I don't believe a detail adds value to pre-sale, but it should help it sell faster and get more attention than it would in it's original condition.  Maybe I'm wrong though, with the amount of pet hair, this may have gotten a lot of attention, just not the right kind.

Process

  • Engine Bay Detail with the Tornador Black & Zep Citrus  
  • Wheels cleaned with Meguairs D140 and various brushes
  • Wheel wells cleaned with Meguiars D108
  • Pre-foamed with Angelwax Fastfoam
  • 2BM hand wash with Carpro Reset. 1 hour up to this point in prep
  • Mechanical Decontamination with clay mitt and ONR as lube. 
  • Paint was protected with Angelwax Ti-22
  • Tires were dressed with carpro PERL
  • Pet hair was removed with a pet hair brush, stone and vacuum
  • Interior plastics cleaned with Angelwax Absolution and detail brush.
  • Interior fabric was clean with a steam machine
  • Glass cleaned with Blackfire Glass Cleaner


2014 Audi A6 Intensive Polish

The owner of this car purchased it 8 months ago and was ready for it to receive it's first formal detail after 2.5 years on the road.  The owner was also interested in seeing the process so that he can undertake some of the basic maintenance himself in the future. 

Process

  • Wheels cleaned with Ardex Proper and various brushes
  • Wheel wells and tires cleaned with Meguiars D108
  • Pre-foamed with Angelwax Fastfoam
  • 2BM hand wash with Carpro Reset.
  • Mechanical Decontamination with clay mitt and ONR as lube. 
  • Polished with Boss21, rupes yellow pad and angelwax Regenerate, Rupes Nano and LHR75
  • Paint was coated with Angelwax Ti-22
  • Wheels were coated with Carpro Hydro2
  • Tires were dressed with carpro PERL
  • Glass cleaned with Blackfire Glass Cleaner

Review: PB Super Slick & Foam

I received this product at no charge from Meghan, and in return, I agreed to provide a review on the forum. I will try to keep this as objective as I can.

Abbreviated copy from AG

Poorboy World Super Slick & Foam is a foaming car wash shampoo perfect for pre-soaking your car before washing. Designed to work with your foam gun or foam cannon, Poorboy World Super Slick & Foam produces a thick layer of foamy suds that cling to the surface lifting dirt and grime from your paint. Providing an extra element of lubrication, Poorboy World Super Slick & Foam makes your entire car washing process safer than ever before! [Later in the copy they mention that this rinses free]

I am a huge fan of pre-foaming a car and do it for viturally every car I work on that isn't getting a rinseless or waterless wash. I believe that it provides a longer dwell time than water alone and the detergents and other goodies aid in softening deposits (better than water alone) thereby allowing for a safer contact wash.

There have already been a number of people that have provided feedback on this product during the development phase and one of the comments that I remember clearly was to keep the grape frangrance, and they did. The grape fragrance is mouthwatering this is a keep away from kids kinda smell. 

The product is fairly thick, but easily dissolves in water. I used at the recommended 2oz soap to 8oz water in my MJJC foam cannon with the smaller orifice for use with electric pressure washers. The 1:4 dilution is pretty heavy compared to other products that are at 1:10. It has a very tight foam structure primarily with some medium and large cells. 

It clings pretty well to this GTI with no protection left. As stated in the AG copy, it does rinse free with no discernible residue left behind. It also did a decent job of carrying dirt and deposits away from the paint as a touchless wash.

Applying

Dwelling

After Rinsing

Upon completing the pre-foam, I continued to use my 10oz mixture to re-foam the car for a handwash. The soap was quite slick and once again rinsed away freely. Overall it was a pleasure to work with. Below is a picture of my RINSE bucket after the hand wash. I don't think I've seen that much foam in my rinse bucket ever. 

2011 Porsche Boxster Spyder Polish and Ceramic Coating

This is the second car I've done for this client.  He recently sold his 2016 Spyder in favor of this 2011.  He felt that he could better enjoy the car being able to drive it without the major depreciation of the 2016 model.  This car came in relatively good condition for a 6 year old vehicle.  Very light marring throughout and a few deeper defects.  The angles on this car present some challenges and a number of different polishers were used to get into all the tight spaces.  

Process

  • Wheels cleaned with Ardex Proper and various brushes
  • Wheel wells and tires cleaned with Meguiars D108
  • Pre-foamed with Angelwax Fastfoam
  • Canvas top agitate with horse hair brush
  • 2BM hand wash with Carpro Reset.
  • Mechanical Decontamination with clay mitt and ONR as lube. 
  • Polished with Boss21, rupes yellow pad and Sonax Perfect Finish, Rupes Nano and LHR75
  • Paint was coated with Pinnacle Blacklabel coating
  • Top was protected with 303 Fabric Guard
  • Wheels were coated with Kisho SI-02
  • Tires were dressed with carpro PERL
  • Glass cleaned with Blackfire Glass Cleaner


2013 Audi Allroad Angelwax Detail

I am proud to say that I am normally not brand loyal.  I seek out the products that perform the best with my methods and I use them to their potential.  I spend a lot of time testing different products to ensure that I can speak from experience as to their suitability on a job.  That being said, there is something called synergistic compatibility within the detailing industry.  That is, a particular company has developed their products to work together.  Angelwax is one of those companies.  They are a small group of industrial chemists that develop and manufacture their product line.  There is a lot of important information in that last sentence.  Their founders are chemists, not retailers.  They develop their products, not hire a third party.  They manufacture their products, they don't buy it from someone else and put their label on it. All this adds up to a group with ownership of the product and process and the quality reflects that ownership commitment.  

This scuba blue allroad belong to a long time friend.  His wife has an A3 that I ceramic coated a year ago and he messaged me recently to tell me he washed both cars and while the A3 was much dirtier, it was easier to clean and looked better.  I recognised that it's a huge problem when a car guy tells me his wife's car looks better than his, so we got him on the books for an angelwax detail.

Process

  • Engine Bay Detail with the Tornador Black & Zep Citrus  
  • Wheels cleaned with Ardex Proper and various brushes
  • Wheel wells cleaned with Meguiars D108
  • Pre-foamed with Angelwax Fastfoam
  • 2BM hand wash with Angelwash
  • Mechanical Decontamination with clay mitt and ONR as lube. 
  • Polished with Boss21, rupes yellow and Angelwax Regenerate, Nano and LHR75 for tight areas
  • Paint was protected with Angelwax Ti-22
  • Paint was topped with Angelwax Enigma
  • Tires were dressed with Angelwax Elixir
  • Glass cleaned with Blackfire Glass Cleaner

Lamborghini Huracan Follow-up

I recently completed a PPF Prep on this car, you can find the post here:

http://www.detailedcreationsmpls.com/blog/2017/4/23/lamborghini-huracan-ppf-prep

It's always my preference to do these jobs in two phases, this ensures that if anything happens to the paint at the PPF installer, it can be resolved without taking any additional clearcoat.  It would be unfortunate to get the paint perfect, only to have some new defects imparted when the PPF installer washes it.  I make a point to work at least one pad width beyond the PPF extents so that I don't have to get the polisher anywhere close to the film. 

The previous inspection found a lot of sanding marks, some swirls and some deeper scratches.  Upon further inspection, more sanding marks were found on the back end, and quite a few deeper scratches that were reduced. 

Process

  • Wheels and tires cleaned with Carpro Reset and Meguiars D108
  • Prefoamed with Angelwax Fast Foam
  • Hand wash with Carpro Reset
  • Mechanically decontaminated with clay bar and ONR
  • Compounded with the following combos: Boss 21 with Boss fast MF pads and fast correcting cream, Flex kompakt with flex orange foam and M100
  • Polished with the following combos: Boss21 with Rupes yellow and Menzerna final polish, Adams swirl killer mini, rupes yellow and griots correction cream, flex kompakt, flex black pad and menzerna final finish Rupes Nano with Rupes yellow and griots corretion cream
  • Body Prep wipe down was performed with Prep-Sol
  • Paint was protected Nanoceramic Easy Armor
  • Exhaust was polished with Pinnacle Exhaust cleaner and brightener
  • Exhaust was coated with Nanoceramic Superior
  • Trim was protected with Ultima Tire & Trim Guard
  • Engine with clean with Meguiars D114 and steam
  • Engine Protected with 303AP


Engine Detailing Tip - The soft Bristle Brush

When people think of using a brush in their engine bay, the initial thought it typically for cleaning.  It's a reasonable assumption that you will need to break out a brush or two along with some elbow grease to clean up the average engine bay.  You are likely to find baked on grime, fluid and dirt build-up and dust in crevices that a towel or hand just can't reach.  Most of these tasks are going to be undertaken with a medium or stiff brush to break-up the grime and shift sand and dirt.  But once all the dirty work is done, there is one more task for the brush...dressing. This trick isn't complicated or a trade secret, it just isn't widely publicized.  

Take note of your specific engine bay to determine what size brush is going to be appropriate, but the best option I have found is a relatively large brush (bristle area about the size of a fist) with long, flag-tipped bristles. Below is an example offered by Mother's and available at most auto parts stores.  These are often sold as wheel brushes, but this may be too large for some engines. Once you have finish cleaning the engine bay and wiped down the majority of the moisture, liberally spray all the non-metal surfaces with your preferred water-based protectant.  For me, that's 303 Aerospace Protectant.  It leaves a factory sheen that is dry to the touch.  It won't attract more dirt and makes everything a little easier to clean. Once you've allowed the protectant to dwell for a few moments, spray the brush a few times with your protectant and then work it into all the surfaces you've sprayed. Where this technique really excels is intricate areas like intake manifolds and on rubber hoses.  You get complete and even coverage without protectant heavily pooled in corners.  Next, follow up with a microfiber towel to remove  any excess and even our the finish.  Finally, spray your microfiber with one or two more hits of protectant and wipe the rubber seals along the outer edges of the engine bay.  This application method can cut your time to just a few minutes, ease your labor and give you top quality results.